Samplers, Steps and CFG in ComfyUI: KSampler Settings
What all those knobs in KSampler actually do, and which way to turn them so noise turns into a real picture
KSampler in ComfyUI: what sampler, scheduler, steps, CFG, seed and denoise do. Which values a beginner should set, and why your image suddenly turns to mush or gets fried.
What KSampler is, in plain words
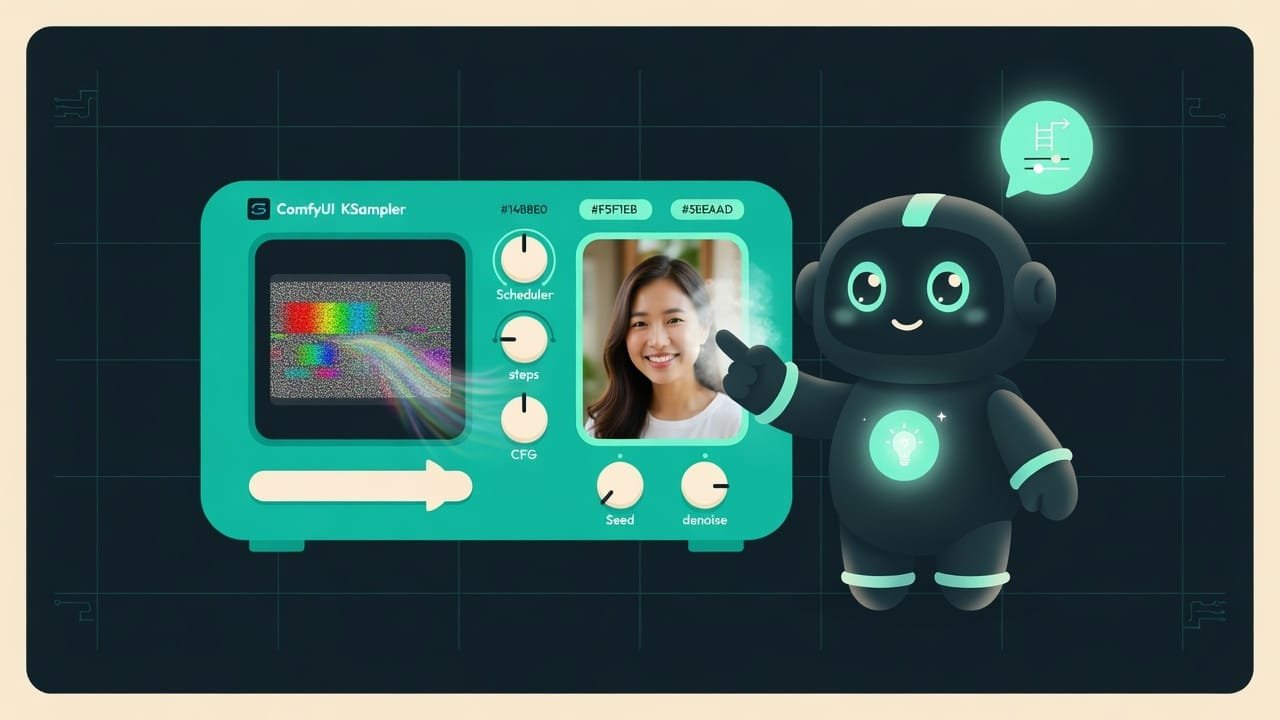
Picture a magic oven. You put a chunk of colored noise inside - that classic TV static - and tell it in words what you want. The oven browns that noise over and over, step by step strips away what doesn’t belong, and a picture emerges from the static. Magic? Almost. Just the controllable kind.
In ComfyUI this oven is called KSampler KSampler is the main node in ComfyUI that turns random noise into a picture over several denoising steps. The heart of almost any workflow. . And all those scary knobs on it - sampler, scheduler, steps, CFG, seed, denoise - are just baking settings. Which recipe. How long. How strictly to follow your order.
It looks like a spaceship control panel. In reality it’s six understandable knobs. And three of them you barely touch.
Why a vibecoder should bother with KSampler settings
You’re a vibecoder, not a neural-net engineer. Fair. But without these knobs you’ll be:
- getting mush or soup and having no clue which knob is to blame;
- waiting three times longer than you need to - because you cranked 60 steps just in case;
- copying someone’s settings off YouTube and not knowing how to fix them for your own task;
- catching that “sort of the same, but different” feeling and wondering why the picture won’t repeat.
Good news: the default values from this lesson work almost every time. Memorize one set and you can generate all evening, touching one or two knobs at most.
How KSampler works: breaking down the six knobs
1. Sampler - the recipe for removing noise
Sampler A sampler is the algorithm that decides exactly how to strip noise out of the image at each step. Different samplers give a slightly different style, speed and stability. is the mixing method. One oven, but different programs: one bakes fast and chaotic, another slow and smooth. It noticeably affects quality, speed and style.
There are dozens of names, and that wall of text scares beginners. Don’t let it. Two are enough:
- euler (or euler a) - fast, snappy, a touch more “creative.” Perfect for quickly running an idea past the model.
- dpmpp_2m (a.k.a. DPM++ 2M) - smooth, stable, loves detail and realism. Your everyday workhorse.
2. Scheduler - how fast the oven cools down
Scheduler A scheduler sets the schedule: how big a chunk of noise to remove at each step. It works in tandem with the sampler. comes as a package deal with the sampler. If sampler answers “how” to remove noise, scheduler answers “at what pace.” Big broad strokes at the start, careful touches near the end.
And here, again, one word is enough: karras. The combo dpmpp_2m and karras is the go-to standard for quality pictures. Set it and forget it.
3. Steps - how many steps a generation needs
Steps are how many times the oven passes over the image, removing noise. Too few steps and the picture isn’t “baked through” - it stays raw and blurry. Too many and you wait longer, your GPU heats up, and there’s almost no payoff.
The law of diminishing returns rules here. The difference between 5 and 20 steps is huge. Between 30 and 60, your eye can barely catch it.
4. CFG scale - how strictly the model follows the prompt
CFG scale CFG scale (Classifier-Free Guidance) is the force with which the model holds to your text prompt. The higher it is, the more literally the model follows the prompt, at the cost of naturalness. is my favorite knob. It’s about obedience: how strictly the oven has to fulfill your order.
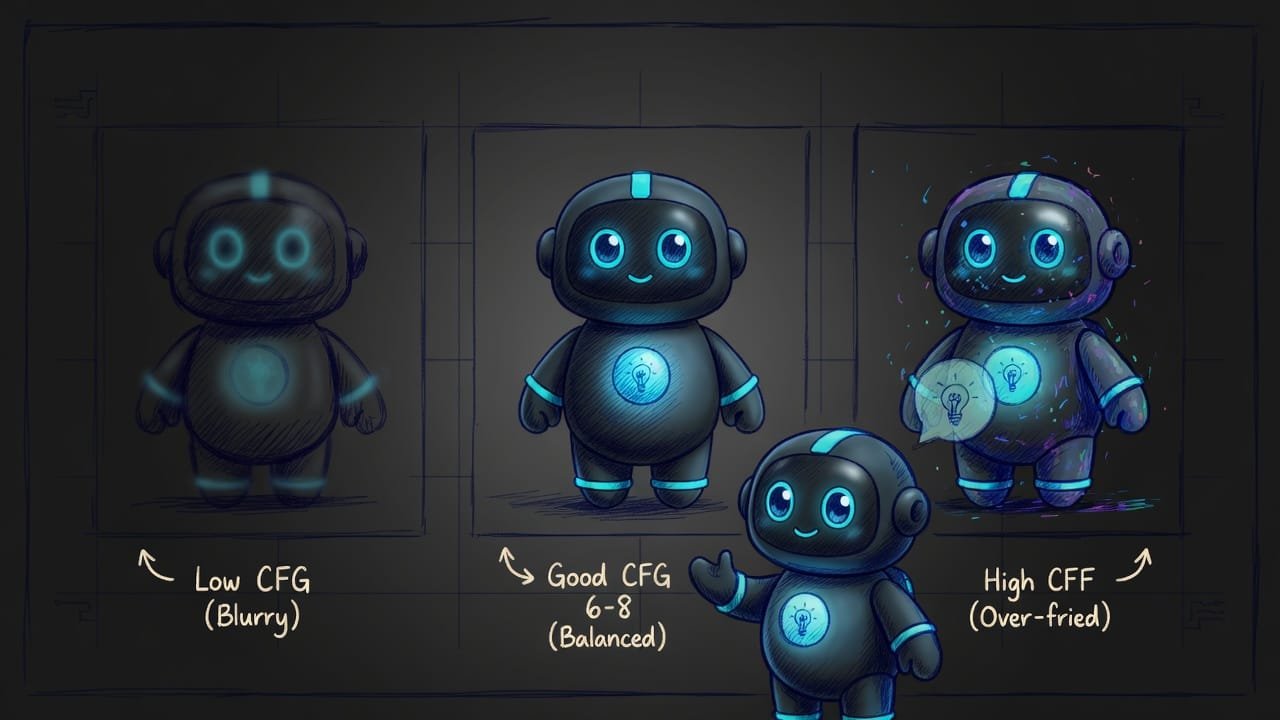
- Low CFG (2-4): the model freestyles, only half-listening to you. The picture’s lively, but it easily drifts away from the prompt.
- Medium CFG (6-8): the golden mean. The model hears you and isn’t boxed in.
- High CFG (12 and up): “you said banana-samurai, here’s your banana-samurai.” The picture often gets fried: acid colors, harsh edges, artifacts.
5. Seed - why the same picture keeps coming back
Seed A seed is the starting number from which that initial noise is born. The same seed with the same settings gives you exactly the same picture. is your lottery ticket number. The initial noise is born from it. The rule is dead simple:
- Same seed and same settings - exactly the same picture. A lifesaver when you’ve caught a lucky shot and want to tweak it slightly.
- New seed - a new attempt. Same prompt, different picture.
In ComfyUI the seed usually has a “fixed” mode or a “randomize each time” mode. Hunting for an idea? Let it change. Found a golden shot? Lock the seed and tweak everything else.
6. Denoise - how much noise to wipe (and why it matters in img2img)
Denoise is how much noise to remove, from 0 to 1.
- 1.0 - wipe all the noise and draw the picture from scratch. Your default mode for text-to-image.
- Below 1.0 - leave part of the source image untouched. That’s img2img territory: you take an existing picture and ask the model to “rework it slightly.” 0.5 changes it noticeably, 0.2 barely touches it.
Starter KSampler settings: a beginner’s cheat sheet
Don’t cram all of it. Memorize this starter set - it works almost everywhere.
Sampler - dpmpp_2m
Scheduler - karras
Steps - 25
CFG - 7
Seed - random mode while you’re hunting for an idea
Denoise - 1.0 for text-to-image
Then tweak one knob at a time:
picture mushy - bump CFG toward 8 or steps toward 30;
colors acidic and fried - drop CFG toward 5;
found a lucky shot - lock the seed, then change the rest.
What to turn when the picture is mushy or fried
- CFG - the first knob for ‘mush’ or ‘fry.’ One step at a time.
- Steps - push toward 30 if detail is lacking. Above 40 is nearly useless.
- Seed - click away freely, these are free new attempts.
- Sampler - flip between euler and dpmpp_2m if you want a different character.
- Denoise for text-to-image - leave it at 1.0, or you'll get mush.
- Exotic samplers from the bottom of the list - you'll kill an evening for no gain.
- CFG past 12 ‘so it definitely obeys’ - almost always just makes it worse.
- Steps near 100 ‘for quality’ - that's wasted time and a hot GPU.
Example: how to fix a murky picture without panicking
You ask for a portrait of a girl by a window. You hit generate - and the face looks like it’s coming out of fog, the picture’s murky, like it didn’t finish baking. What does a beginner do? Turns everything at once: swaps the sampler, runs 80 steps, sets CFG to 15. And it only gets worse - now the face is acid-orange with harsh edges.
So what actually happened?
- The murkiness came from too few steps - you should’ve raised steps from 8 to 25, not to 80.
- CFG 15 didn’t “improve obedience,” it fried the picture into artifacts.
- You changed everything at once - and never figured out which knob did what.
Here’s how a vibecoder who knows the ropes would do it: set the starter set from the cheat sheet, generate, then move one knob at a time and watch the result. Boring? Sure. But it works.
- Set the default - dpmpp_2m, karras, steps 25, CFG 7, denoise 1.0.
- Generate. Don’t like it? Change ONE knob and watch the effect.
- Mushy or short on detail - steps toward 30 first, and if that doesn’t help, CFG toward 8.
- Fried, acidic, broken edges - CFG down toward 5.
- Like the composition but missing the little things - lock the seed and refine the prompt.
- Write down the winning combo of settings so you don’t have to hunt for it again.
Common beginner mistakes in KSampler
- Cranking steps up to a hundred “for quality.” After 30 there’s almost no difference - you just wait longer.
- Maxing out CFG so it “definitely obeys.” Above 8-10 you usually start getting fry and artifacts.
- Turning denoise during text-to-image. It should be 1.0, or you’ll get mush.
- Changing everything at once. Then you can’t tell which knob did the work. Move one at a time.
- Not fixing the seed. You catch a perfect shot, hit generate, and it’s gone forever.
- Fearing the sampler list. You need two: dpmpp_2m and euler. The rest can wait until you’ve settled in.
TL;DR - если коротко
- KSampler is the oven where a picture is baked out of noise. Six knobs control the bake.
- Sampler + scheduler are the recipe. A safe pair to start with: dpmpp_2m and karras.
- Steps are how many passes the oven makes over the image. 20-30 is plenty almost always; more is nearly wasted.
- CFG is how literally the model follows your prompt. 6-8 is gold. Too high fries it, too low and it goes off-script.
- Seed is your lottery ticket number: same seed = same picture.
- Denoise stays at 1.0 almost always. You only touch it in img2img - and on purpose.