ComfyUI Checkpoints and Models: How to Choose and Where to Put Them
Without a ComfyUI model, it's just a pretty box with wires, and nothing more.
What a ComfyUI checkpoint is, how models differ by style and weight, where to put files in models/checkpoints, how to choose a model for a task, and where to download them.
What a Checkpoint Is, in Simple Terms
Imagine ComfyUI is a kitchen. A stove, pots, knives, beautifully arranged wire-recipes. Everything gleams. But you can’t cook anything. Know why? No chef.
In the world of ComfyUI, a checkpoint A checkpoint is a file containing a trained neural network for generating images. Inside are the model's 'knowledge' of how objects, styles, and textures look. It's what turns your text into an image. acts as that chef. It’s a file containing a trained neural network – all its visual experience from millions of images. Load the chef, and the kitchen comes alive; ask for any dish. Don’t load it, and you’re left staring at an empty pot, wondering what went wrong.

Why the Model Is Everything (and What Your Errors Have to Do With It)
The most common beginner’s pain point sounds familiar: “I downloaded ComfyUI, installed everything, hit generate – error.” Or: “I generate the same thing, and it’s always blurry.” Nine times out of ten, the wires and the prompt aren’t the problem. The model is to blame:
- The model is not selected or the file is in the wrong place – ComfyUI simply doesn’t see it.
- The model chosen is not for the task – you ask for a vibrant photo, but there’s an anime chef in the kitchen, and he dutifully draws anime.
- The model is too heavy for your graphics card – everything freezes or crashes with a memory error.
Understand models, and you stop fighting the program and start using it. Style, quality, speed, and even “will it even run” – all of it depends on your checkpoint choice. Let’s break it down.
What’s Inside a Checkpoint
A checkpoint is a chef with specific experience. One spent their life shooting food for glossy magazines – a master of photorealism. Another drew comics – everything they make comes out in an anime style. A third painted with oils – you get paintings. They were trained on different sets of images, hence their distinct character.
Give three checkpoints the same prompt – “girl in a red coat on an autumn street” – and you’ll get three different images. One will draw a photograph. The second, an anime frame. The third, a watercolor. Same prompt. Different chef. That’s all the magic.
Types of ComfyUI Models
We won’t dive into technical generations – that’s just noise for starters. It’s enough to keep three simple divisions in mind.
Models by Style: Photo, Anime, Art
- Photorealistic – images that look like real photographs: people, food, interiors, nature.
- Stylized (anime, cartoon, comic) – drawn images with clear lines and vibrant colors.
- Artistic – painting, watercolor, concept art, “as an artist would paint it.”
Models by Weight and VRAM Appetite
A checkpoint is a file, and it weighs a fair bit: usually from a couple to several gigabytes. The newer and more powerful the model, the heavier the file and the more VRAM Video memory (VRAM) - the graphics card's memory. This is where the model is loaded during generation. If the model doesn't fit, ComfyUI slows down or crashes with an out-of-memory error. it demands. A heavy chef cooks tastier dishes, but also needs a more spacious kitchen.
Models by “Base” (Family)
Models are built on different core engines – called families or bases. This is important for one reason: add-ons must be from the same base as the checkpoint. LoRAs, styles, and other extensions for one base won’t get along with another. Remember the principle; you can pick specific family names for your task later.
- Runs almost anywhere – even on a modest graphics card.
- Calculates quickly – images in seconds, convenient for iterating ideas.
- Small file size – downloads fast and doesn't hog disk space.
- Higher quality – more details, cleaner hands and faces.
- Reads prompts more accurately – more precisely matches what you described.
- Requires a powerful graphics card – will freeze or crash on weaker hardware.
Where to Put the Model So ComfyUI Sees It
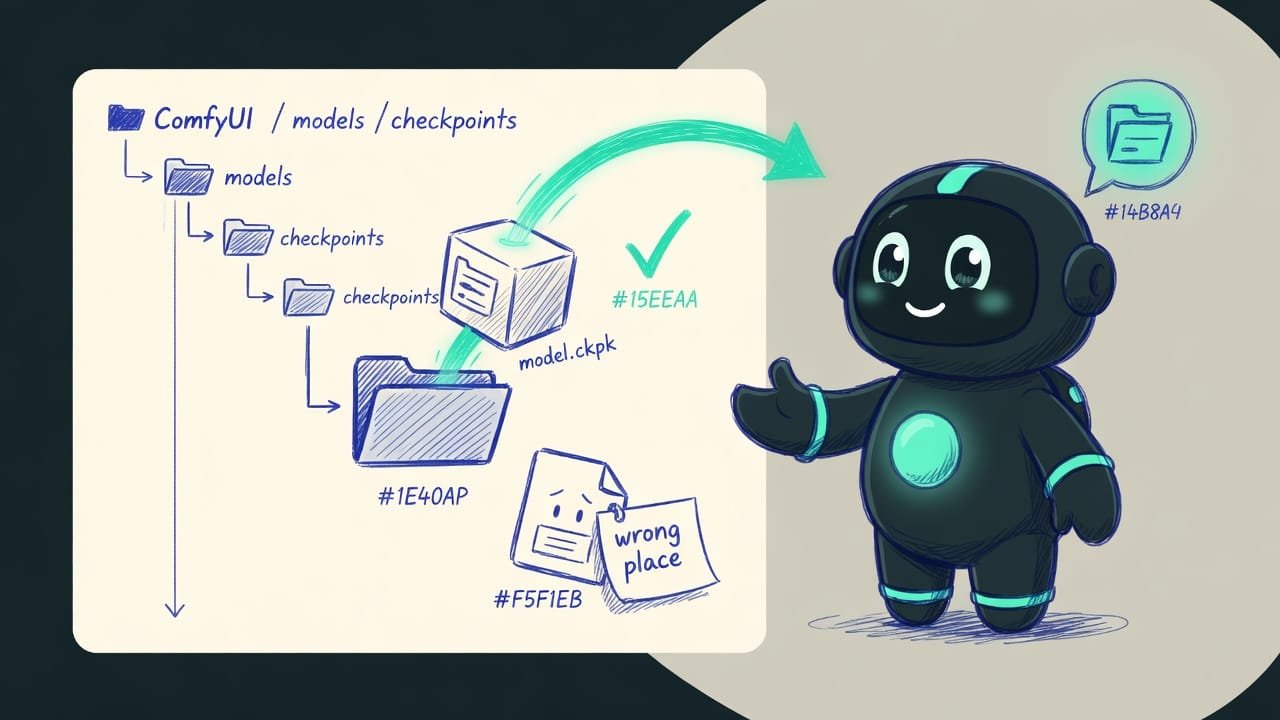
This is where every other beginner stumbles. Downloaded a model, threw it into a random folder, opened ComfyUI – and the list is empty. No magic here: the program looks for checkpoints in one single place.
Inside your ComfyUI folder, there’s a models directory, and within that, checkpoints. That’s where the model file goes. Put it there, refresh the list in the interface – and the chef appears in the dropdown menu. That’s it.
ComfyUI/
models/
checkpoints/   - put the downloaded checkpoint file here
loras/         - put LoRAs and style add-ons here
vae/           - put separate VAEs here, if the model requires them
Where to Download Models and What to Look For
Models are hosted on specialized catalog platforms: you go in, browse examples, download the chef you like. But blindly grabbing one isn’t a great idea. Keep three things in mind.
- Source. Get models from well-known, verified platforms. A random file from a chat or a shady link is both a risk to your computer and a chance to download a “broken” chef.
- Work Examples. There’s almost always a gallery on the model’s page. Scroll through it – you’ll immediately understand its character: does it lean towards realism, anime, or painting?
- License. Each model has its own terms. Some can be used however you like, including selling images. Others are for personal use only. Planning to make money from the results? Read the license beforehand.
Real-Life Example: How to Choose a Model for a Task
You’re making cover images for your coffee blog. You need warm, lively photos of cups and beans. A beginner installs the first model they find – which turns out to be an anime chef – writes a long prompt about “realistic photo, soft light, 8k,” and gets a drawn cup with big eyes. They get frustrated, blaming ComfyUI.
But someone who understands does the opposite. First, they select the chef for the task – a photorealistic model. They put the file in the correct folder. Select it from the list. And only then do they sit down to write the prompt. The image comes out on the first or second try.
- Decide what style you need: photo, anime, or painting.
- Download a suitable checkpoint from a verified platform (browse examples).
- Place the file in the ComfyUI/models/checkpoints folder.
- Refresh the list in the interface and select the model in the checkpoint loader node.
- Only now, write your prompt – and start the generation.
Common Beginner Mistakes with Checkpoints
- Forgetting the model. Without a selected checkpoint, ComfyUI doesn’t work – it’s not a bug, it’s by design.
- Putting the file in the wrong place. Only
models/checkpoints. In any other folder, the program won’t see it. - Not refreshing the list. If you dropped the file while the program was running, hit refresh or restart, otherwise the model won’t appear.
- Trying to fix the wrong model with a prompt. An anime chef won’t become a photographer just by saying “realistic.” Model first, then words.
- Installing the heaviest model on a weak graphics card. It will freeze and crash. For modest hardware – a lighter model.
- Downloading everything. Dozens of “just in case” checkpoints will clog your disk and do nothing else. Two or three working ones are enough.
TL;DR - если коротко
- Checkpoint is the 'brain' of generation: a file with a trained neural network. No checkpoint means ComfyUI won't draw anything.
- Style is determined by the model, not just the prompt: one checkpoint leans towards photo, another towards anime, a third towards painting.
- Place the file strictly in models/checkpoints. Missed the folder? The list will be empty.
- File size = VRAM appetite: a heavy model draws cleaner, but requires a more powerful graphics card.
- Download only from verified platforms and read the license – not every image can be sold later.
- Two or three working models are enough. A hundred 'just in case' checkpoints will only clog your disk.